
Simple Tips To Minimize Risk
4 Slackline Safety Tips
As the popularity of slacklining rises so does the potential for injury. It’s important to go into this practice knowing there are risks, and what you can do to minimize those risks. I’ve been slacklining for a little over 4.5 years now, and have had a few of my own injuries. A jammed toe that may have been broken, a rolled ankle that swelled and discolored, bruised ribs, and of course the minor cuts, line kisses (you know when the line snaps back and gives you a nice stinging kiss), leg and armpit bruises. There’s many safety issues to consider when slacklining, for now lets dive into some details on 4 safety tips that may help prevent serious injuries as you get started and as you continue this slacklining practice.
1. TREE PROTECTION

Using tree protection is a great habit to get into when using trees as your anchor points. Tricklines and garden lines are usually carrying a large load of tension in order to keep the line taught. Make sure your anchors (trees) are big enough not to break or snap under the pressure. I would recommend only using trees that are 25-30cm and larger in diameter.
Now that you have an idea of the size trees you need, lets talk tree protection. This is the act of covering the tree with some sort of padding underneath where the line will be wrapped around the tree. This padding can be many things, an old towel, some carpet remnants, an old yoga matt or you can purchase tree protection pre-made from Slackline Industries online. The purpose of the tree protection is in the name. It’s to protect the tree from rubbing and abrasion caused from the line. It acts as a double safety net protecting the tree as well as protecting the slackline. The last thing you want is the line getting cut by some tree bark while it’s under tension and your walking on it! So be safe, use protection.
2. PAD & TAPE THE LINE
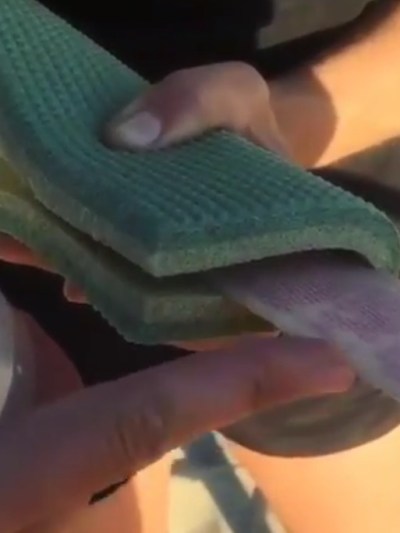
Next I want to talk about how you can minimize your bruises when learning to trickline or when doing inversions and static poses on the 1″ slacklines. This is a neat little trick I learned From Olga Henry on her Instagram account. You can take an old yoga mat, and cut it long ways or vertical creating a long narrow strip of padding that you can fold over the line. The width of your cut will matter according to what size line you are padding. The length of the yoga mat will depend on what tricks or poses you are working on. I would recommend at least 5 or 6 ft long for tricklining and at least 2-3 ft. for static poses on the 1″ line.
Whether it’s a 1″ or 2″ line, you want to be sure when you fold the mat over the line it goes past the line edge about 1/2″. To hold the mat in place you need to tape it. Be sure to tape it thoroughly until you can no longer see the yoga mat. For a great visual tutorial check out this link to Olga Henry’s Instagram.
The padding on the trickline softens the landing for many transitions such as butt bounces and chest bounces. For the 1″ line it softens the line for inversions and static poses involving pressure on the ankles. So have fun and explore these dynamic moves with your new pillow soft padding.
3. EQUIPMENT CHECK / GROUND CHECK

Now lets examine the importance of equipment checks and ground checks before you set up your line. Over the course of time and use of your equipment, things happen. Carabiners get bent and nicked, your webbing gets frayed, perhaps you loose a tree protector. Save yourself some time, make sure you have all your gear and that it’s safe before you set up your line. It’s much better to notice a frayed line before you tension it and start walking on it. Doing regular safety checks allow you to monitor the wear and tear on your gear, so you know when a piece needs to be replaced.
Your gears checked and safe, now lets check your surroundings. I know it sounds simple, but a quick ground check can prevent a twisted ankle or an unwanted sharp rock cutting your foot. I recommend clearing away any loose yard debris and rocks to help ensure safe landings when you spring off your webbing.
4. MAKE YOUR LINE VISIBLE & BREAK DOWN WHEN YOUR DONE

It’s important to make your line visible, especially when slacklining in parks or any public area. We don’t want to get hurt and we don’t want anyone else to get hurt. You know the line is there, but from a distance it’s hard to see a 1″ or 2″ webbing. By taking some thin strips of bright-colored fabric and taping or tying them on the ends and middle of your line, you’re doing 2 beneficial things. You’re helping to prevent unnecessary injury to a pedestrian or bicyclist by making the line visible and you’re helping to keep the line calm when it’s windy. The fabric acts as a dampener, settling the movement in the line whenever the wind picks up. A simple but effective trick!
It’s been a fun day walking, the sun is starting to set, it’s time to pack it up and go. Breaking down your gear is a safe and smart practice. It prevents wear and tear from the elements as well preventing others from using it who don’t have knowledge on how to slackline safely. Help keep yourself and others safe, break it down and take it home.
I hope these tips are helpful in creating a safe slacklining practice. I would love to hear any of your safety tips you might want to share. Send me a note in the comment box and happy slacklining everyone!
Peace,
Buddy Thomas